
Blog
What an Easy Checkout Feels Like for Your Customers
Keep your checkout fast, simple and reassuring so every click counts. A practical guide for Australian small businesses
WordPress plugin development is the process of creating custom PHP extensions that add or modify website functionality through WordPress’s hook system, modular code structure, and secure coding practices. Every plugin on the WordPress.org directory follows this same foundation. Whether you are building a booking form, a membership gate, or a custom API integration, the underlying process is consistent. This guide to WordPress plugin development covers prerequisites, file structure, core coding techniques, security, and deployment so you can build production-ready plugins with confidence.
Plugin development requires a working knowledge of PHP, HTML, CSS, and JavaScript. PHP is the primary language because WordPress itself is built on it. HTML and CSS handle output and presentation. JavaScript becomes necessary once you start building interactive elements or working with the Gutenberg block editor.
Your local development environment matters more than most beginners expect. A local server stack like LocalWP or XAMPP lets you test changes without touching a live site. A code editor with PHP support, such as Visual Studio Code with the PHP Intelephense extension, speeds up development considerably. Version control with Git is not optional for professional work.

Essential tools at a glance:
| Tool | Purpose |
|---|---|
| LocalWP or XAMPP | Local WordPress server environment |
| Visual Studio Code | Code editing with PHP and JS support |
| Git | Version control and collaboration |
| WP-CLI | Command-line WordPress management |
| Query Monitor | Real-time debugging inside WordPress |
Security basics belong in this list too. Before you write a single hook, understand what nonces are, why capability checks matter, and how WordPress handles user roles. Many tutorials rely on outdated patterns from 2013 that are insufficient for professional plugin work in 2026. Starting with the right habits saves you from rewriting everything later.
Pro Tip: Install the WordPress Plugin Developer Handbook as a browser bookmark from day one. It is the authoritative reference for hooks, APIs, and coding standards, and it is updated regularly.
Before you write any code, pause and ask whether a custom plugin is actually necessary. Tools like Advanced Custom Fields sometimes fulfil the requirement with far less complexity, as noted in plugin development evaluations. If a custom plugin is the right call, proceed with a clear scope.
Every WordPress plugin lives inside its own folder within wp-content/plugins/. The folder name becomes the plugin’s slug, so choose something unique and descriptive. Inside that folder, create a main PHP file with the same name as the folder. That file is the entry point WordPress reads first.
The plugin header comment is mandatory. WordPress reads it to display your plugin in the admin dashboard. A proper header comment includes the plugin name, version, author, description, and licence fields. Without it, WordPress will not recognise the file as a plugin at all.
A well-organised plugin folder looks like this:
my-plugin/my-plugin.php — main entry file with header comment and bootstrap logicmy-plugin/includes/ — core class files and service container setupmy-plugin/admin/ — admin-facing classes, views, and assetsmy-plugin/public/ — front-end classes and assetsmy-plugin/languages/ — translation files for internationalisationModern plugin architecture uses PHP namespaces and autoloading. Namespaces prevent class name collisions with other plugins. Autoloading, typically via Composer’s PSR-4 standard, means you never need a manual require statement for each class file. This structure mirrors how Laravel packages are organised, which makes the codebase far easier to navigate and extend.
Pro Tip: Register your autoloader in the main plugin file before anything else runs. If your autoloader fails silently, every class call after it will throw a fatal error that is difficult to trace.
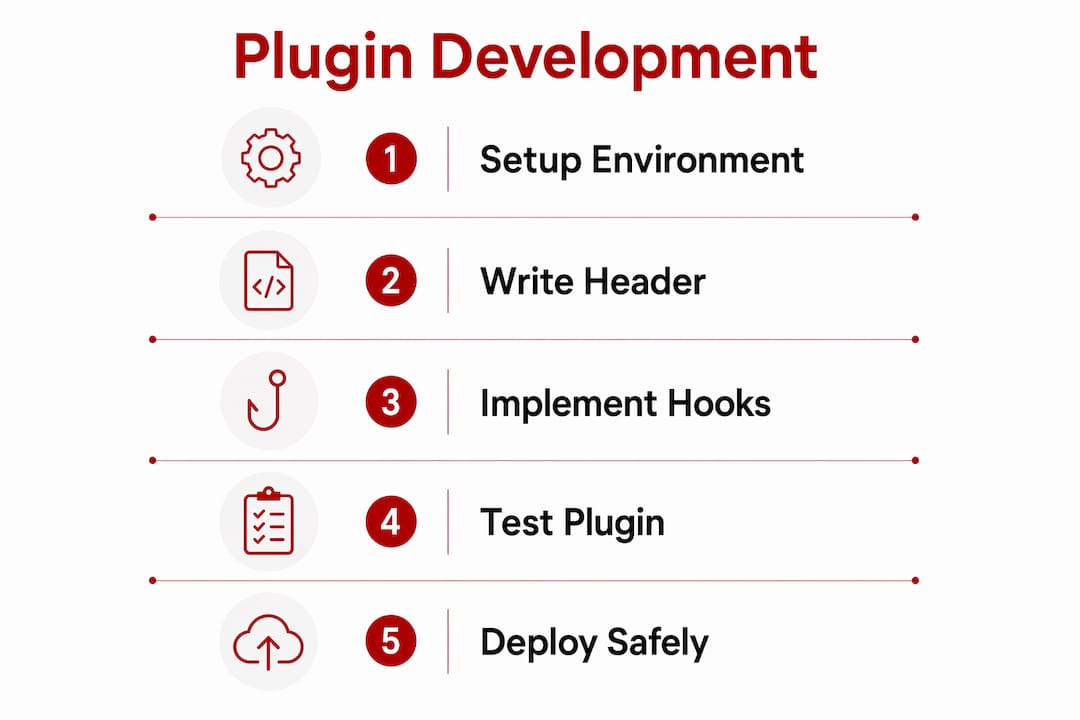
The 5-step core development cycle starts here: create the folder and main file, add the header, implement hooks, test locally, then deploy. That sequence is not arbitrary. Each step depends on the previous one being correct.
WordPress’s hook system is the mechanism that makes plugins work. Actions let you execute code at specific points in the WordPress lifecycle. Filters let you modify data before it is used or displayed. Every feature you build attaches to one or both of these.
Object-oriented programming with a service container is the current standard for production plugins. A PSR-11 compliant service container manages class dependencies cleanly, so you are not passing objects manually through every function call. This approach resembles how modern PHP frameworks handle dependency injection, and it pays off quickly as the plugin grows.
Security is not a final step. It is woven into every part of the code you write. Plugin security vulnerabilities concentrate in four areas:
sanitize_text_field() or absint()esc_html(), esc_attr(), or wp_kses() before it reaches the browser“Security is the primary differentiator for professional plugins. Mandatory implementation of nonces, capability checks, sanitisation, and escaping ensures hardening that separates commercial-grade work from hobbyist code.”
For block-based interfaces, WordPress’s Interactivity API in Gutenberg is the recommended approach for new plugin UIs. It reduces JavaScript overhead compared to loading a full React application and performs better on page load. If you are building any front-end interaction into your plugin, start with the Interactivity API rather than reaching for a standalone JS framework.
Pro Tip: Avoid procedural patterns for anything beyond a simple utility function. A plugin built entirely on global functions becomes very difficult to test and nearly impossible to extend without breaking something.
Learning plugin development also gives you a deep understanding of the WordPress boot sequence, which is critical knowledge for any custom feature engineering beyond basic site management.
Testing locally before touching any live environment is the baseline expectation for professional plugin work. Local testing combined with reliable hosting deployment is the proven method for ensuring plugin stability and security before launch. Use Query Monitor to inspect hook execution, database queries, and PHP errors in real time during local development.
A structured deployment process looks like this:
WP_DEBUG set to true) and review the debug log for warningsUpdate mechanisms and proper uninstall routines are requirements, not optional extras. If you plan to submit to the WordPress.org directory, reviewers check for these. Even for private client plugins, a clean uninstall routine signals professional work and protects the client’s database.
The investment in modern architecture pays a measurable return. Building with modern OOP and a service container adds roughly two weeks to the initial build but saves three to six months of maintenance effort over the plugin’s lifetime. That trade-off is straightforward for any plugin intended for ongoing use. For a guide to securing your WordPress site, the same principles apply at the platform level.
Pro Tip: Write a readme.txt file in the WordPress.org format from the start, even for private plugins. It forces you to document the plugin’s purpose, requirements, and changelog, which saves time when handing the project to another developer.
Asporeadigital builds custom WordPress plugins for small businesses and professional projects across Canberra and the Capital Territory. Every plugin follows the modern OOP architecture and security standards covered in this article, including PSR-11 service containers, nonce verification, and proper uninstall routines. The focus is on code that works reliably, stays maintainable, and does not create security liabilities for the business using it.
If you need a plugin built to a professional standard without the overhead of managing the development yourself, Asporeadigital offers affordable custom plugin development with fixed pricing and direct support. For businesses that also want guidance on keeping their WordPress installation secure, the WordPress security tips resource is a practical starting point.
WordPress plugin development produces reliable, maintainable results when you combine modern OOP architecture, PSR-11 dependency management, and security-first coding from the very first file.
| Point | Details |
|---|---|
| Start with the right tools | Set up a local server, a capable code editor, and Git before writing any plugin code. |
| Structure matters from day one | Use namespaced OOP, Composer autoloading, and a clear folder layout to keep the codebase maintainable. |
| Security is built in, not bolted on | Implement nonces, capability checks, sanitisation, and output escaping throughout every feature. |
| Modern architecture saves time | OOP with a service container adds two weeks upfront but saves three to six months of maintenance later. |
| Test before every deployment | Use a staging environment, WordPress debug mode, and Query Monitor before pushing to production. |
A WordPress plugin is a PHP file or collection of files that extends or modifies WordPress functionality through the hook system. Plugins live in the wp-content/plugins/ directory and activate through the WordPress admin panel.
Build time depends on complexity. A simple plugin with one feature can take a few hours. A production-ready plugin using modern OOP architecture typically takes two to four weeks, with the additional upfront time saving significantly on long-term maintenance.
Yes. PHP is the core language of WordPress plugin development. You also need working knowledge of HTML, CSS, and JavaScript for any plugin that includes a user interface or front-end interaction.
The WordPress Plugin Developer Handbook is the official reference for plugin coding standards, APIs, hooks, and security requirements. It is maintained by the WordPress core team and updated regularly.
Yes, provided your plugin passes a manual review. Reviewers check for security issues, proper uninstall routines, a valid readme.txt file, and adherence to WordPress coding standards before approving a submission.
Keep your checkout fast, simple and reassuring so every click counts. A practical guide for Australian small businesses

Practical digital learning for business owners. Start with Asporea Digital Academy’s free course on why your website isn’t ranking.
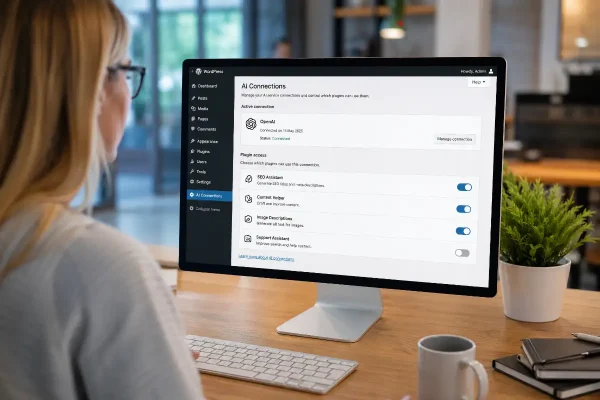
WordPress 7 AI connectors may help small businesses manage AI tools, content support, SEO and website controls more safely.