
Blog
Website Handover: What You Should Receive Before You Call It “Done”
A handover document gives you access to your site to update, protect, measure and get support without needing anyone else.
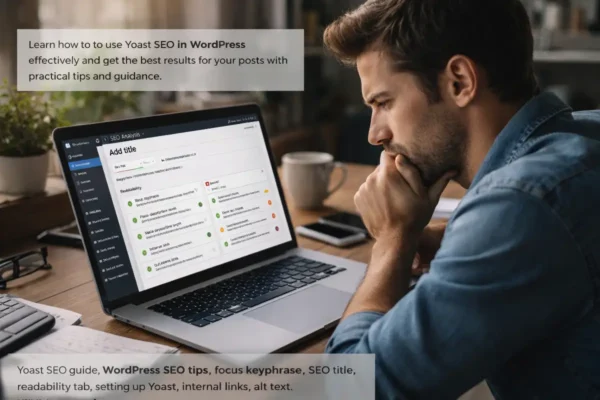
Yoast SEO is a WordPress plugin that helps you optimise your content for search engines by guiding your structure, keywords and readability.
Yoast is most useful when you use it in the right order.
A lot of first-time WordPress users open Yoast after they finish writing, see a stack of red and orange warnings, and start changing random things. That usually makes the post worse, not better.
The better approach is to set the important fields first, write the post clearly, then use Yoast to sharpen what is already there. Yoast’s own guidance is built around that idea: define your focus keyphrase, optimise the snippet, then use the SEO and Readability analysis to improve the page.
The first field that matters is the focus keyphrase.
This is the main phrase you want the post to rank for. Yoast uses that phrase to evaluate the rest of the page. If the keyphrase is vague, too broad, or not really what the post is about, the rest of the feedback becomes less useful. Yoast describes the focus keyphrase as the search term you want the page to rank for, and it checks the content against that phrase.
Pick one clear phrase that matches what a real person would search. Then stick to it.
Before you chase any green lights, fill in the snippet properly.
That means your SEO title, slug, and meta description.
Yoast treats the SEO title as an important topic signal, and it specifically checks whether your keyphrase appears there. Its slug guidance is also very clear: keep it short, clear, and focused on one primary keyword. Its meta description guidance focuses on making the result appealing enough to win the click.
This is the order that makes sense:
write the keyphrase, write the SEO title, clean up the slug, then write the meta description.
If those fields are weak, the rest of the optimisation is starting on the back foot.
Yoast checks whether the keyphrase appears in the introduction, and that is one of the most useful checks in the plugin. The reason is simple: the opening paragraph should make the topic obvious straight away. Yoast’s guidance is that using the keyphrase in the introduction helps clarify what the page is about.
This does not mean jamming the phrase in awkwardly.
It means your first paragraph should be clear enough that both Google and the reader can immediately tell what the article covers.
Yoast pays close attention to headings, paragraph length, and subheading distribution. Its readability analysis checks whether longer texts are broken up properly and whether the structure is easy to follow.
For a normal blog post, that means:
each section should have a job,
each heading should move the article forward,
and no part of the post should feel like a wall of text.
This is where Yoast is usually right. If the structure is messy, readers feel it before Google does.
Yoast also checks keyphrase placement and density. It wants to see that the page is genuinely about the topic you chose. Its own SEO guidance recommends using the focus keyphrase in important parts of the post, including the SEO title, the introduction, subheadings, and the meta description.
The important word here is naturally.
You do not need to force the phrase into every paragraph. You do need enough clear signals that the topic is consistent all the way through the page.
If the writing starts sounding repetitive, you have gone too far.
The Readability tab looks at sentence length, paragraph length, passive voice, transition words, and subheading distribution. Yoast says these checks exist to make the text easier to read and understand.
That is the right way to use it.
Do not treat it as a game where every dot must turn green. Use it to spot where the post is becoming harder to read than you intended.
If Yoast tells you the paragraphs are too long, shorten them.
If it tells you the sentences are too long, trim them.
If it flags weak transitions, check whether the piece actually flows.
That is sharpening. That is useful.
Yoast is quite firm on passive voice. Its explanation is that passive construction makes sentences more distant and harder to process, and it recommends keeping passive voice low.
That is good advice in general.
But this is one of the places where common sense matters. Some passive sentences are fine. The real question is whether the sentence feels direct and easy to understand. If it does, move on. If it feels woolly, rewrite it.
This is one of the easiest wins in Yoast and one of the most often ignored.
Internal links help connect the post to the rest of your site. They also make it easier for readers to keep moving through related content. Yoast includes internal linking in its SEO analysis because it helps search engines understand how your content fits together.
Every solid blog post should usually link to at least one or two relevant pages or articles on your own site.
Yoast also likes to see outbound links. That is not because every post needs a bibliography. It is because a sensible external link can add context, support a claim, or help the reader go deeper. Yoast includes outbound links in its content analysis for that reason.
Use them where they strengthen the page. Do not scatter them around for decoration.
Yoast checks image alt tags as part of its SEO feedback. Its beginner guidance specifically mentions image alt attributes as one of the common checks.
This matters because images give you another chance to reinforce what the page is about, and alt text also improves accessibility.
Describe the image clearly. If the keyphrase fits naturally, include it. If it does not, do not force it.
The basics of Yoast are straightforward:
The more advanced work comes after that.
That is where you start using Yoast to improve internal linking across related posts, strengthen topic clusters, tighten metadata for better click-through, and make sure each post has a distinct search purpose. Yoast’s own guidance on content analysis and snippet optimisation supports that progression from basic setup to refinement.
Yoast is not there to write the post for you.
It is there to help you tighten a post that already has a clear topic, a sensible structure, and a useful purpose.
Start with the fields that matter. Then use the plugin to improve clarity, structure, and search signals. If you do that, Yoast becomes very practical very quickly. If you start chasing green lights for their own sake, it becomes noise.
A handover document gives you access to your site to update, protect, measure and get support without needing anyone else.

Clubs are moving membership renewals online to reduce admin, free up front desk staff and make dues, payments and member updates easier to manage.

Build your online profile early to turn experience into coaching, courses, mentoring and new income before you need it fast.